Psion 5 Palm Top
Account: username, password and DNS server settings
These items are entered within the Network control panel in the following way.
- In the System screen tap on the Control
Panels button
 in the top right
hand corner of the screen.
This should produce the Control Panels screen below.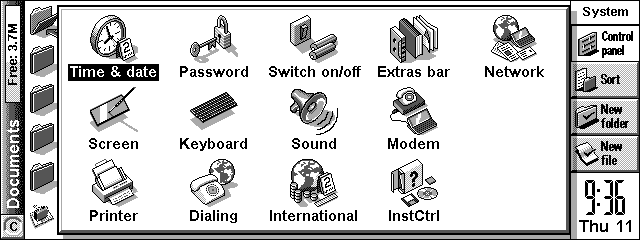
- Open the
 control panel (aka Internet control panel.) This will produce the
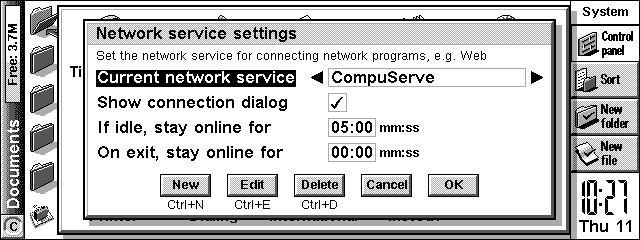
following window.
 - If your ISP is listed within the Current
network service list box select it and tap on
 .
.
If your ISP is not listed within the Current network service list box tap on .
.
For the purposes of this document we will choose New. The only difference is that choosing Edit for one of the ISP templates will have some of the details already filled in for you.
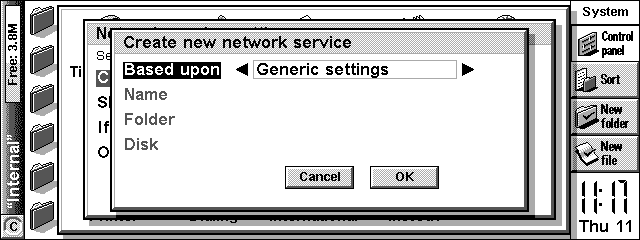
- This will produce the following screen.
Select Generic settings in the Based on list box then click on

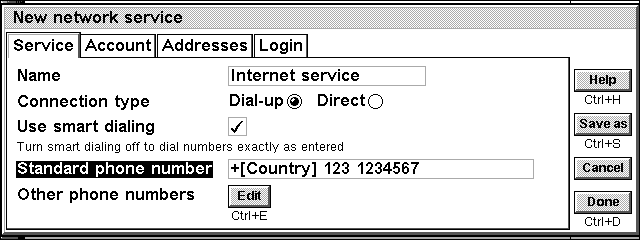
- On the following screen enter in the area code and telephone number for the ISP dial-up point on the Standard phone number line of the Service information card.
- On the Account information card uncheck the Ask before connecting line. This will allow you to set your ISP account username and password now, rather that entering this information in every time you connect with your ISP.
-Under user name enter you’re the login name for your account.
-Under password, enter the password for your account and confirm it by entering it again on the line below.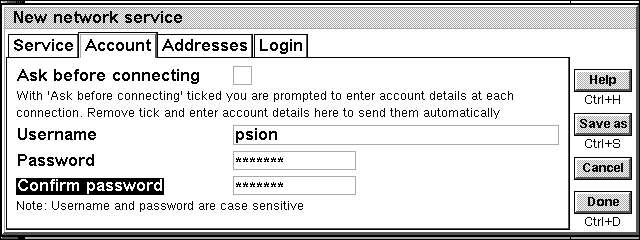
- On the Addresses information card enter the Primary and Secondary DNS server numbers in on the Primary DNS address and Secondary DNS address lines.
-If your ISP has given you a static IP address for your account enter this in on the IP address line.
-If you ISP uses dynamic IP addressing for your user IP address, then check the line Get IP address from server.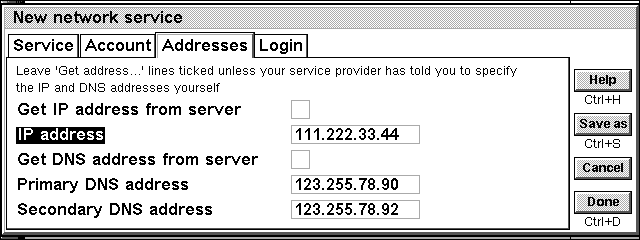
- The login information card allows you to setup a dialog script for the ISP if they use one.
-If they do not use a login script then uncheck the Use login script line.
-If they do use a login script you will need to obtain a copy of the script from the ISP. The script on the Psion needs to mirror the script that the ISP uses. Information on how prepare scripts can be found in the Adobe Acrobat document entitled message.pdf provided with the messaging suite software.
Email settings: username, password and mail server
These settings are made within the e-mail application. Open the e-mail application and enter the mail account settings, such as the user name e-mail address, e-mail password, POP mail server and SMTP mail server addresses.
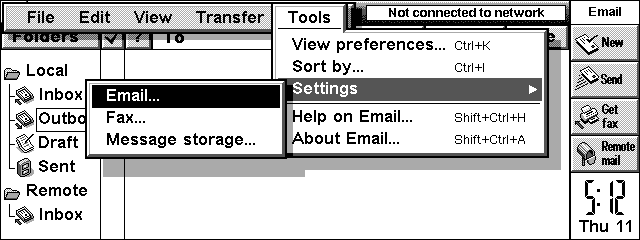
- On opening the e-mail application, tap on the menu bar and select the Tools menu, then choose Settings and finally Email from that menu.
- The following window will appear for Incoming and Outgoing mail settings. In the Outgoing window you enter your e-mail address and Email (SMTP) server address.
The Your name line is used to enter the full name that you wish to be displayed with the e-mail address, on the header of all your outgoing messages.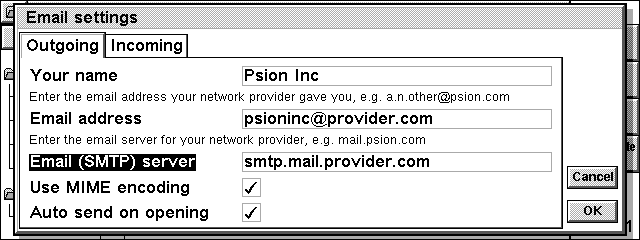
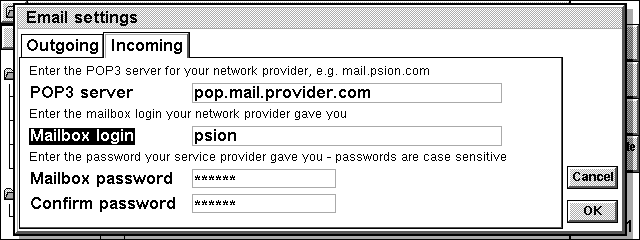
- For the incoming e-mail settings enter the POP mail server address in on the POP3 server line, your e-mail login name on the Mailbox login line and the mailbox password (twice.) In most cases the mailbox login and password is the same as your account login and password.
Setting the Modem properties
For the message suite software to
communicate successfully with the Modem, you need to give the Psion Series 5 some
information about the modem's properties. These fall into the following categories.
| Modem properties | Example |
| Handshaking settings | Does it use XON/XOFF, RTS/CTS, DSR/DTR or DCD |
| Initialization string | ATZ, AT&F, AT&F0, AT&F1,…….. |
Modem properties for the modem that you are using are set within the Modem control panel. To set up your Modem properties on the Psion follow this procedure.
There are already settings for a Psion Travel Modem, Psion Dacom Modem,US Robotics Sportster and Hayes compatible modems provided with the software.
- Open Control panels from the system screen.
- Open the
 control panel. This will produce the widow below.
 - To enter settings for a New modem tap
on
 . The following window will appear
as a result.
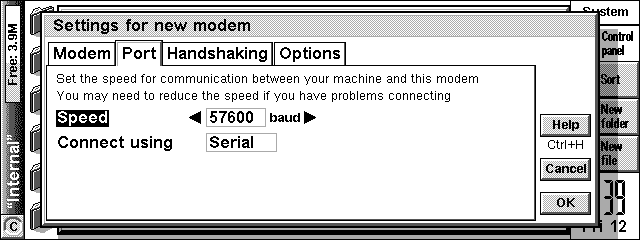
 - For Port settings, if you are using the Psion PC card adapter you must set the serial speed to less than 57600, as this is the maximum serial speed of the adapter irrespective or the modem that you are using.
- Handshaking is another area that the modem can be sensitive to. In brief, if you are using a Psion Travel Modem the settings below are those that you should use.
- The options screen allows you to set loud speaker and dial timing. These settings should be fine as they are and there is no need to reset them, as they are not really modem specific.
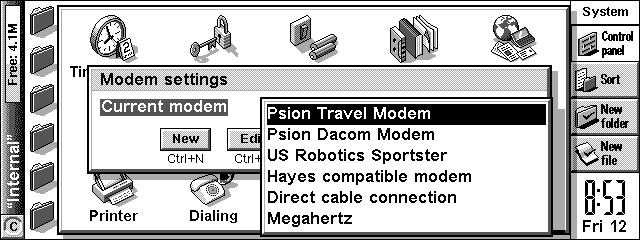
If your modem is already in the list them
simply select the modem and tap on OK. If you need to enter details specific to your
modem, that are not already covered by existing modem settings then move on to the next
step.
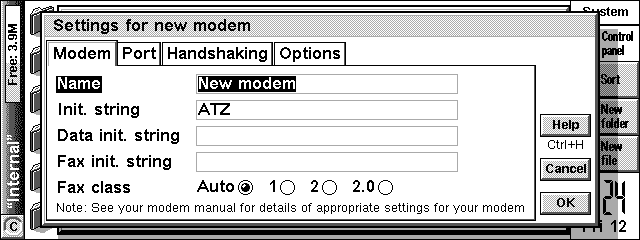
In this window, enter a description or the
name of the modem under the Name line and enter the appropriate initialization string in
on the Init string line. The correct initialization string for your modem can be obtained
from the user guide provided with the modem, or direct from modem manufacturer.
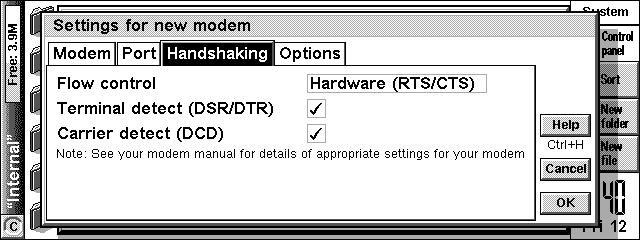
Most other modems will use the following alternative settings:
Flow controlHardware (RTS/CTS)
Terminal detect (DSR/DTR)(unchecked)
Carrier detect (DCD)(unchecked)
Setting/confirming the dialing properties
One last thing to do is to visit the dialing control panel simply to initialize location specific (i.e. home, work, mobile) dial settings on the Series 5. This will make sure that the Message Suite software dials the number correctly with regard to your location.
- Go into the Control panels from the System
Screen and open the
 control
panel. This will produce the widow below.
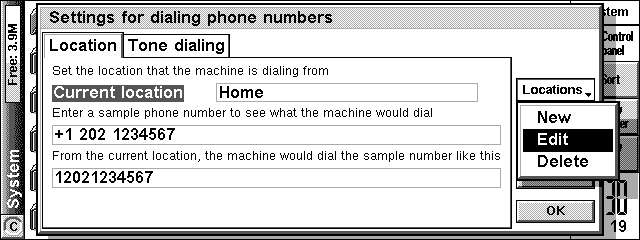
 - Tap on Locations and choose Edit from the Drop down list and the following window will appear.
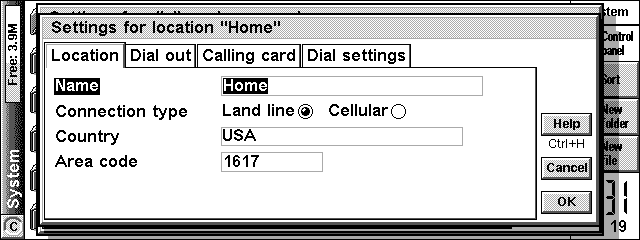
The items that need checking are the Area code for the selected location. This will ensure that the software dials the correct number for your internet account local access number, with regard to your location. The Dial out settings on the card behind will allow you to set a dial out code for your office location.